Difference between revisions of "The Sewers"
MatiasDesu (talk | contribs) |
|||
| (2 intermediate revisions by one other user not shown) | |||
| Line 1: | Line 1: | ||
| − | The Sewers is the first part of the Prologue | + | The Sewers is the first part of the Prologue. In this level, you can learn the basic things to start playing Die Young (movement, climbing, combat, crafting, etc...) |
==The Start== | ==The Start== | ||
| − | Nehir starts in a sewer where she can't escape because | + | Nehir starts in a sewer, where she can't escape because of the two guard dogs guarding the entrance. She only has one option, start walking through the mysterious sewer with only a lighter. |
The first mission added to the Quest menu is "Escape the Island - Find the Exit of the Sewers". | The first mission added to the Quest menu is "Escape the Island - Find the Exit of the Sewers". | ||
| − | |||
| − | |||
| − | |||
| − | |||
==The First Jump== | ==The First Jump== | ||
| − | After walking | + | After walking through the first Sewer, the jump mechanic becomes available, and players are taught the mechanic through a tutorial prompt. |
You can easily jump just pressing the Jump button ([[Controls]]).<br> | You can easily jump just pressing the Jump button ([[Controls]]).<br> | ||
[[File:jumpdy.jpg|500px]] | [[File:jumpdy.jpg|500px]] | ||
==The First Weapon== | ==The First Weapon== | ||
| − | After climbing the first spot you | + | After climbing the first spot, you find your first weapon--a Wooden Stick ([[Weapons]]). This weapon can be used to kill small enemies.<br> |
[[File:woodenstickdy.jpg|500px]] | [[File:woodenstickdy.jpg|500px]] | ||
==The First Enemies== | ==The First Enemies== | ||
| − | After taking the Wooden Stick you | + | After taking the Wooden Stick, you will come across your first enemies--Rats. They are small, have low health, and do low damage. If you encounter them in a big group, that's when the problem arises. So, kill them fast and do not allow them to converge.<br> |
[[File:ratsdy.jpg|500px]] | [[File:ratsdy.jpg|500px]] | ||
==Ladders== | ==Ladders== | ||
| − | After crouching and walking | + | After crouching and walking through a sewer, you will spot the first ladder. To climb it, just press the Jump button ([[Controls]]) when you see the indicator. [[File:climbindicator.png|30px]]<br> |
[[File:laddersdy.jpg|500px]] | [[File:laddersdy.jpg|500px]] | ||
==Kidnapped== | ==Kidnapped== | ||
| − | In the Sewers you | + | In the Sewers, you will come across a kidnapped victim that you cannot save. <br> |
[[File:kidnappeddy.jpg|500px]] | [[File:kidnappeddy.jpg|500px]] | ||
==The First Document== | ==The First Document== | ||
| − | In one wall you can find the first document | + | In one wall, you can find the first document. There are a lot of documents in the game and you can find them disbursed throughout the map. |
| − | The first document is called "Escape Route" and | + | The first document is called "Escape Route", and it's a map that'll aid your escape from the Sewers (and with another marked spot).<br> |
[[File:firstdocumentdy.jpg|500px]] | [[File:firstdocumentdy.jpg|500px]] | ||
[[File:escaperoutedoc.png|205px]] | [[File:escaperoutedoc.png|205px]] | ||
| Line 40: | Line 36: | ||
==The First Medkit== | ==The First Medkit== | ||
You can find the first Medkit in one wall of the Sewers. | You can find the first Medkit in one wall of the Sewers. | ||
| − | One Medkit fully | + | One Medkit will fully restore your Health and heals all statuses. ([[Consumables]])<br> |
[[File:firstmedkitdy.jpg|500px]] | [[File:firstmedkitdy.jpg|500px]] | ||
==The First climbing spot== | ==The First climbing spot== | ||
| − | In the Sewers, you can also find the first Climbing | + | In the Sewers, you can also find the first Climbing tutorial. |
To climb it, just press the Jump button ([[Controls]]) when you see the climb indicator. | To climb it, just press the Jump button ([[Controls]]) when you see the climb indicator. | ||
| − | <strong><i> You can press | + | <strong><i> You can press this button to use "Perception" ([[Controls]]) to highlight all possible climbing areas.</i></strong><br> |
[[File:firstclimbingspotdy.jpg|500px]] | [[File:firstclimbingspotdy.jpg|500px]] | ||
==The Exit 4== | ==The Exit 4== | ||
| − | The Exit 4 (that is shown in the first document) is a door | + | "The Exit 4" (that is shown in the first document) is a locked door that cannot be unlocked. |
| − | You need to find another way to escape from the Sewers.<br> | + | You'll need to find another way to escape from the Sewers.<br> |
[[File:exit4dy.jpg|500px]] | [[File:exit4dy.jpg|500px]] | ||
==The First Crowbar & Padlocks== | ==The First Crowbar & Padlocks== | ||
| − | The Crowbar is a weapon (Weapons) that can be used as a tool to unlock | + | The Crowbar is a weapon (Weapons) that can be used as a tool to unlock certain doors with padlocks. |
| − | + | You can unlock the door from the left side from the site you found the Crowbar (and can be useful for the future too). | |
| − | <strong><i>Padlocks can be unlocked with Crowbar holding the "Attack/Use item" button | + | <strong><i>Padlocks can be unlocked with Crowbar by holding the "Attack/Use item" button.</i></strong><br> |
[[File:thefirstcrowbar.jpg|380px]] [[File:padlocksdy.jpg|380px]] | [[File:thefirstcrowbar.jpg|380px]] [[File:padlocksdy.jpg|380px]] | ||
| Line 66: | Line 62: | ||
Hold the "Canteen" button ([[Controls]]) (with Empty Bottles in the inventory) to make it. | Hold the "Canteen" button ([[Controls]]) (with Empty Bottles in the inventory) to make it. | ||
| − | <strong><i>Molotovs can be | + | <strong><i>Molotovs can be used to kill groups of enemies like Rats (throw the Molotovs using the "Throw" button ([[Controls]]).</i></strong><br> |
[[File:craftmolotovsdy.jpg|500px]] | [[File:craftmolotovsdy.jpg|500px]] | ||
==The First Human Enemy== | ==The First Human Enemy== | ||
| − | In the | + | In the Sewer, you will find the first Human enemy, in this case, a "Junk" enemy. |
| − | Human enemies are | + | Human enemies are stronger than the animals and have more varied attacks (like throwing rocks, jump+attack, evade).<br> |
[[File:firsthumandy.jpg|500px]] | [[File:firsthumandy.jpg|500px]] | ||
==The Final of the Sewers== | ==The Final of the Sewers== | ||
| − | After killing (or evading) the human enemy, you | + | After killing (or evading) the human enemy, you will go through the last of the tunnels in the Sewer. Leaving the sewer area activates the second Quest "Go past the Harbor". |
<strong><i>[[The Harbor (part 1)]]</strong></i><br> | <strong><i>[[The Harbor (part 1)]]</strong></i><br> | ||
| − | [[File: | + | [[File:sewersfinal11.jpg|380px]] [[File:sewersfinal22.jpg|380px]] |
Latest revision as of 23:27, 23 May 2019
The Sewers is the first part of the Prologue. In this level, you can learn the basic things to start playing Die Young (movement, climbing, combat, crafting, etc...)
Contents
The Start[edit | edit source]
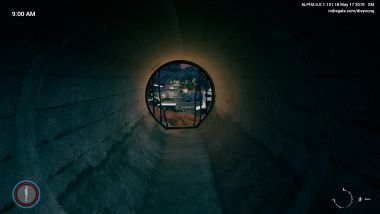
Nehir starts in a sewer, where she can't escape because of the two guard dogs guarding the entrance. She only has one option, start walking through the mysterious sewer with only a lighter.
The first mission added to the Quest menu is "Escape the Island - Find the Exit of the Sewers".
The First Jump[edit | edit source]
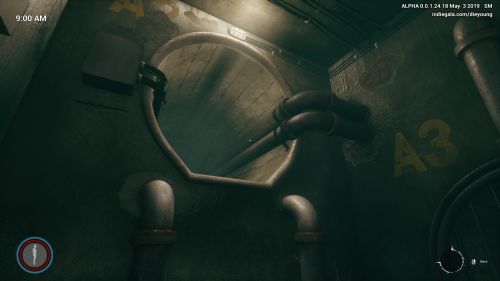
After walking through the first Sewer, the jump mechanic becomes available, and players are taught the mechanic through a tutorial prompt.
You can easily jump just pressing the Jump button (Controls).
The First Weapon[edit | edit source]
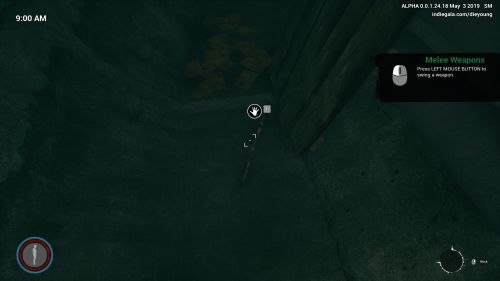
After climbing the first spot, you find your first weapon--a Wooden Stick (Weapons). This weapon can be used to kill small enemies.
The First Enemies[edit | edit source]
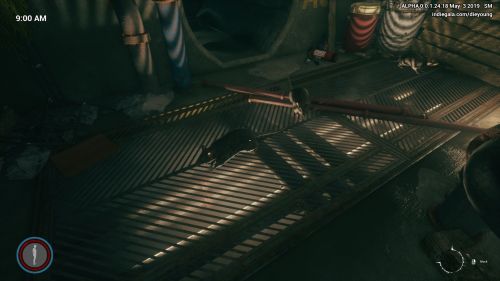
After taking the Wooden Stick, you will come across your first enemies--Rats. They are small, have low health, and do low damage. If you encounter them in a big group, that's when the problem arises. So, kill them fast and do not allow them to converge.
Ladders[edit | edit source]
After crouching and walking through a sewer, you will spot the first ladder. To climb it, just press the Jump button (Controls) when you see the indicator. ![]()

Kidnapped[edit | edit source]
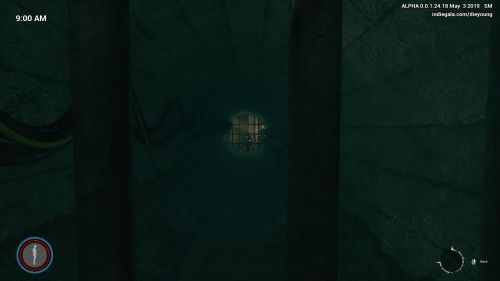
In the Sewers, you will come across a kidnapped victim that you cannot save.
The First Document[edit | edit source]
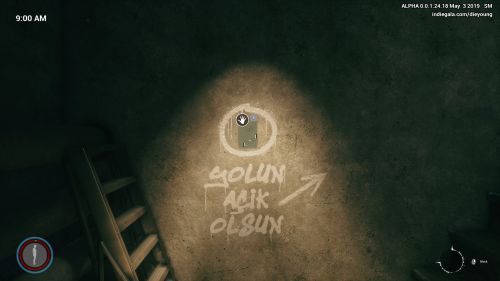
In one wall, you can find the first document. There are a lot of documents in the game and you can find them disbursed throughout the map.
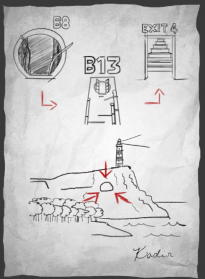
The first document is called "Escape Route", and it's a map that'll aid your escape from the Sewers (and with another marked spot).
The First Medkit[edit | edit source]
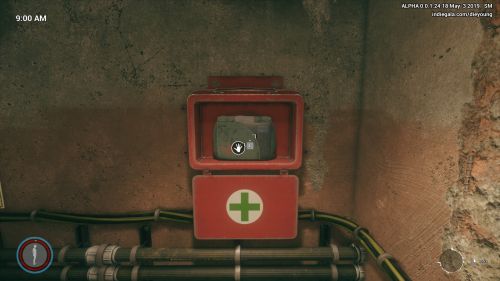
You can find the first Medkit in one wall of the Sewers.
One Medkit will fully restore your Health and heals all statuses. (Consumables)
The First climbing spot[edit | edit source]
In the Sewers, you can also find the first Climbing tutorial. To climb it, just press the Jump button (Controls) when you see the climb indicator.
You can press this button to use "Perception" (Controls) to highlight all possible climbing areas.

The Exit 4[edit | edit source]
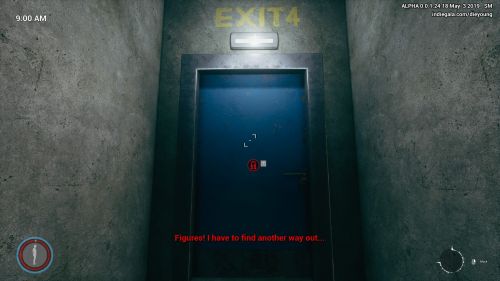
"The Exit 4" (that is shown in the first document) is a locked door that cannot be unlocked.
You'll need to find another way to escape from the Sewers.
The First Crowbar & Padlocks[edit | edit source]
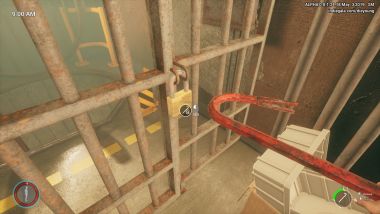
The Crowbar is a weapon (Weapons) that can be used as a tool to unlock certain doors with padlocks. You can unlock the door from the left side from the site you found the Crowbar (and can be useful for the future too).
Padlocks can be unlocked with Crowbar by holding the "Attack/Use item" button.

Molotovs[edit | edit source]
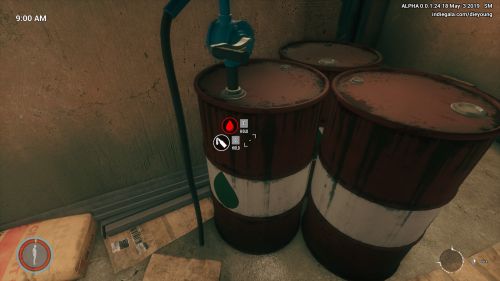
You can easily make Molotovs in the containers with fuel. Hold the "Canteen" button (Controls) (with Empty Bottles in the inventory) to make it.
Molotovs can be used to kill groups of enemies like Rats (throw the Molotovs using the "Throw" button (Controls).
The First Human Enemy[edit | edit source]
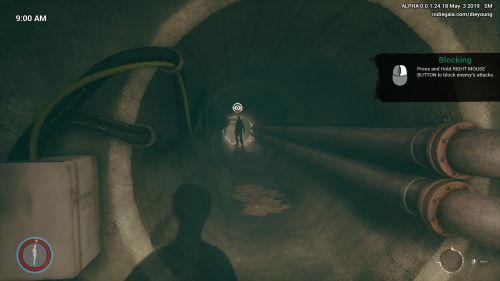
In the Sewer, you will find the first Human enemy, in this case, a "Junk" enemy.
Human enemies are stronger than the animals and have more varied attacks (like throwing rocks, jump+attack, evade).
The Final of the Sewers[edit | edit source]
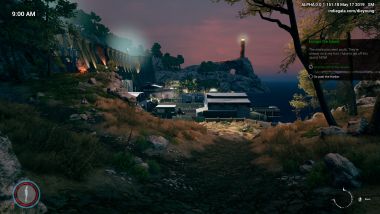
After killing (or evading) the human enemy, you will go through the last of the tunnels in the Sewer. Leaving the sewer area activates the second Quest "Go past the Harbor".
