Difference between revisions of "The Harbor (part 1)"
| Line 2: | Line 2: | ||
==Corpses on Fire and Items== | ==Corpses on Fire and Items== | ||
| − | In the first zone of the Harbor, you can find a lot of items scattered | + | In the first zone of the Harbor, you can find a lot of items scattered around the floor (for example, cloth, bottles, etc... ).<br> |
Also, there is a zone where you can find corpses on fire at the top of a hill, where you can take a first peek at the full Harbor zone (useful to start making a possible route to evade enemies).<br> | Also, there is a zone where you can find corpses on fire at the top of a hill, where you can take a first peek at the full Harbor zone (useful to start making a possible route to evade enemies).<br> | ||
[[File:firstpeekharbordy1.jpg|380px]] [[File:firstpeekharbordy2.jpg|380px]] | [[File:firstpeekharbordy1.jpg|380px]] [[File:firstpeekharbordy2.jpg|380px]] | ||
| Line 12: | Line 12: | ||
==Throwing Rocks to Move Enemies== | ==Throwing Rocks to Move Enemies== | ||
| − | If an enemy blocks your | + | If an enemy blocks your path, you can cause a distraction by throwing ([[Controls]]) a rock. You can throw the rock in any direction, and it will cause noise that the enemy must investigate. (useful to open zones where enemies block the path).<br> |
[[File:throwrock11dy.jpg|380px]] [[File:throwrock22dy.jpg|380px]] | [[File:throwrock11dy.jpg|380px]] [[File:throwrock22dy.jpg|380px]] | ||
| Line 20: | Line 20: | ||
==Enemies and Movement Path== | ==Enemies and Movement Path== | ||
| − | All enemies in the Harbor have a specific movement path | + | All enemies in the Harbor have a specific movement path; you need to learn these routes to try to evade them.<br> |
==Locked Doors (from the other side)== | ==Locked Doors (from the other side)== | ||
| − | Some doors | + | Some doors will be locked from the other side. To open it, you need to find an alternative method to enter the site and unlock it from inside.<br> |
[[File:doorlocked11dy.jpg|500px]] | [[File:doorlocked11dy.jpg|500px]] | ||
==The First Crossbow== | ==The First Crossbow== | ||
| − | In the Harbor, you | + | In the Harbor, you will find the first Crossbow ([[Weapons]]).<br> |
| − | The Crossbow is one of the most powerful weapons of the game | + | The Crossbow is one of the most powerful weapons of the game. The Crossbow can be used to kill enemies from the distance without being detected.<br> |
The Crossbow use arrows as ammo (arrows can be founded in the Harbor or killing Ranged type enemies ([[Enemies]]).<br> | The Crossbow use arrows as ammo (arrows can be founded in the Harbor or killing Ranged type enemies ([[Enemies]]).<br> | ||
[[File:crossbow1dy.jpg|500px]] | [[File:crossbow1dy.jpg|500px]] | ||
| Line 36: | Line 36: | ||
==Tip: Quiver== | ==Tip: Quiver== | ||
| − | Tip: kill that enemy with the Crossbow (shooting an arrow | + | Tip: kill that enemy with the Crossbow (shooting an arrow towards the head) to get the Quiver. <br> |
The Quiver is a useful item that allows the player to stack arrows.<br> | The Quiver is a useful item that allows the player to stack arrows.<br> | ||
[[File:quiverenemydy.jpg|500px]] | [[File:quiverenemydy.jpg|500px]] | ||
==Marked Zones== | ==Marked Zones== | ||
| − | In the Harbor, you | + | In the Harbor, you may come across some marked zones, which can be identified by a yellow cloth. These yellow cloths suggest a possible route to finding the objective.<br> |
<center>[[File:yellowcloth1.jpg|380px]] [[File:yellowcloth2.jpg|380px]] [[File:yellowcloth4.jpg|380px]]</center> | <center>[[File:yellowcloth1.jpg|380px]] [[File:yellowcloth2.jpg|380px]] [[File:yellowcloth4.jpg|380px]]</center> | ||
| Line 49: | Line 49: | ||
==Tip: Watchtower Enemies== | ==Tip: Watchtower Enemies== | ||
| − | Tip: | + | Tip: You can easily kill the Watchtower enemies with a Crossbow; try to reach an elevated position and aim for the head to get an instant kill.<br> |
| − | Killing the Watchtower enemies allows you a little bit more of freedom | + | Killing the Watchtower enemies allows you a little bit more of freedom to explore the Harbor.<br> |
[[File:enemytower11.jpg|380px]] [[File:enemytower22.jpg|380px]] | [[File:enemytower11.jpg|380px]] [[File:enemytower22.jpg|380px]] | ||
==The First Watchtower - Alarm/Gate== | ==The First Watchtower - Alarm/Gate== | ||
| − | In each watchtower, you can find a button that activates an alarm | + | In each watchtower, you can find a button that activates an alarm that'll open the marked gate.<br> |
| − | In the first watchtower, you can open the gate to | + | In the first watchtower, you can open the gate to start a fight between the Military enemies and the junkies (useful to clear some enemies from the map).<br> |
[[File:watchtower11button.jpg|380px]] [[File:watchtower11door.jpg|380px]] | [[File:watchtower11button.jpg|380px]] [[File:watchtower11door.jpg|380px]] | ||
==Tip: Lethal Injection== | ==Tip: Lethal Injection== | ||
| − | The [[Weapons|Lethal Injection]] is a powerful one-use item that can be used to | + | The [[Weapons|Lethal Injection]] is a powerful one-use item that can be used to instant kill Animals and Average-Sized Humans (Military and Junkies).<br> |
You can find the material to craft that item in several parts of the Harbor.<br> | You can find the material to craft that item in several parts of the Harbor.<br> | ||
| − | <i>Try to use it only in extreme | + | <i>Try to use it only in extreme emergencies (if an enemy sees you suddenly, you can instant kill him, without alerting the other guards in that zone) or save it for the final fight.</i><br> |
<center>[[File:lethalinjection1.jpg|380px]] [[File:lethalinjection2.jpg|380px]] | <center>[[File:lethalinjection1.jpg|380px]] [[File:lethalinjection2.jpg|380px]] | ||
[[File:lethalinjection3.jpg|380px]]</center> | [[File:lethalinjection3.jpg|380px]]</center> | ||
==Master Key== | ==Master Key== | ||
| − | The Master Key is the most important item of the Harbor | + | The Master Key is the most important item of the Harbor. With it, you can open all doors that were previously locked.<br> |
| − | To reach that | + | To reach that location, you will need to do a "faith jump" from the tower to the roof of the other side, and go through the air duct.<br> |
<center>[[File:masterkey1.jpg|380px]] [[File:masterkey2.jpg|380px]] [[File:masterkey3.jpg|380px]]</center> | <center>[[File:masterkey1.jpg|380px]] [[File:masterkey2.jpg|380px]] [[File:masterkey3.jpg|380px]]</center> | ||
| Line 76: | Line 76: | ||
==The Elevator== | ==The Elevator== | ||
| − | There are two elevators in the Harbor | + | There are two elevators in the Harbor. One is blocked and the other one is accessible.<br> |
| − | You can use it to | + | You can use it to past from the low part of the Harbor to the high part.<br> |
| − | <strong><i>Tip: | + | <strong><i>Tip: Keep in mind that you are exposed when you use the elevator to cross the Harbor. Sometimes one [[Enemies|Ranged Enemy]] can see you in the Elevator.</i></strong><br> |
[[File:elevator1.jpg|380px]] [[File:elevator2.jpg|380px]] | [[File:elevator1.jpg|380px]] [[File:elevator2.jpg|380px]] | ||
| Line 86: | Line 86: | ||
==The Torch== | ==The Torch== | ||
| − | You can craft a Torch to illuminate dark areas | + | You can craft a Torch to illuminate dark areas. This is useful in one of the zones of the Harbor that is submerged in darkness....and full of enemies.<br> |
| − | <strong><i>Tip: you can equip it in the Toolbar, but | + | <strong><i>Tip: you can equip it in the Toolbar, but be cautious when using it, because the torch is a perishable item. When activated, its lifespan is relevantly short. In other words, just use it when you need it.</i></strong><br> |
[[File:torch22.jpg|380px]] [[File:torch11.jpg|380px]] | [[File:torch22.jpg|380px]] [[File:torch11.jpg|380px]] | ||
==Sewer - The Harbor== | ==Sewer - The Harbor== | ||
| − | In the Harbor, you | + | In the Harbor, you will find a Sewer that is plagued by [[Enemies|Junkies]].<br> |
<strong><i>Tip: try to craft some Molotovs to kill the group of Junkies easily (or just run through all the enemies).</i></strong><br> | <strong><i>Tip: try to craft some Molotovs to kill the group of Junkies easily (or just run through all the enemies).</i></strong><br> | ||
| Line 103: | Line 103: | ||
==The Second Watchtower== | ==The Second Watchtower== | ||
| − | In the second Watchtower, you can activate the button to | + | In the second Watchtower, you can activate the button to open the assigned gate (useful to distract enemies and try to pass to the other side).<br> |
[[File:watchtower22.jpg|380px]] [[File:watchtower2gate.jpg|380px]] | [[File:watchtower22.jpg|380px]] [[File:watchtower2gate.jpg|380px]] | ||
==The Final of the Harbor (part 1)== | ==The Final of the Harbor (part 1)== | ||
| − | After | + | After a little bit of parkour, you can reach the mountain and final segment of the Harbor (part 1). From here, you can reach part 2 of the Harbor, and then the finale of the Prologue.<br> |
<strong><i>[[The Harbor (part 2)]]</strong></i><br> | <strong><i>[[The Harbor (part 2)]]</strong></i><br> | ||
[[File:theharborfinal11.jpg|500px]] | [[File:theharborfinal11.jpg|500px]] | ||
Revision as of 03:23, 24 May 2019
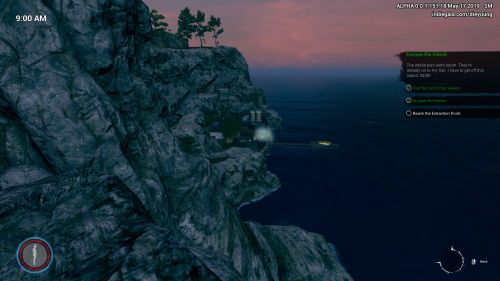
After leaving the Sewers, you will start your second mission "Go past the Harbor".
Contents
- 1 Corpses on Fire and Items
- 2 Hide in Grasses
- 3 Throwing Rocks to Move Enemies
- 4 Perception and Enemies
- 5 Enemies and Movement Path
- 6 Locked Doors (from the other side)
- 7 The First Crossbow
- 8 Document (Item #376-D (Ancient Idol)
- 9 Tip: Quiver
- 10 Marked Zones
- 11 Lift Truck
- 12 Tip: Watchtower Enemies
- 13 The First Watchtower - Alarm/Gate
- 14 Tip: Lethal Injection
- 15 Master Key
- 16 Document (Report - Worker's Riot)
- 17 The Elevator
- 18 Document (Worker's List)
- 19 The Torch
- 20 Sewer - The Harbor
- 21 Document (Test Data (Drug AHBC-#13))
- 22 The Second Watchtower
- 23 The Final of the Harbor (part 1)
Corpses on Fire and Items
In the first zone of the Harbor, you can find a lot of items scattered around the floor (for example, cloth, bottles, etc... ).
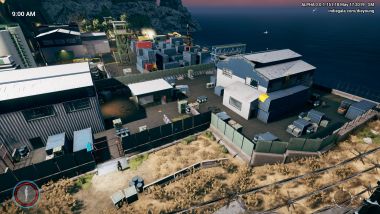
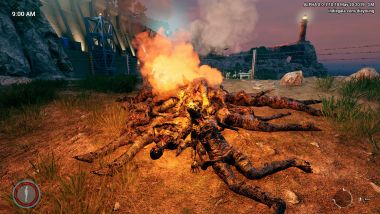
Also, there is a zone where you can find corpses on fire at the top of a hill, where you can take a first peek at the full Harbor zone (useful to start making a possible route to evade enemies).
Hide in Grasses
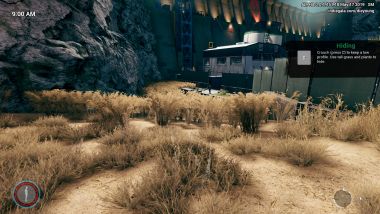
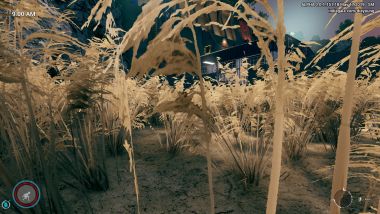
In the game, there is a type of grass you can hide in if you remained crouch (Controls).
When you are hiding in grasses, enemies can't see you (useful to evade enemies).
Throwing Rocks to Move Enemies
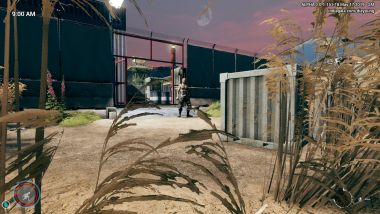
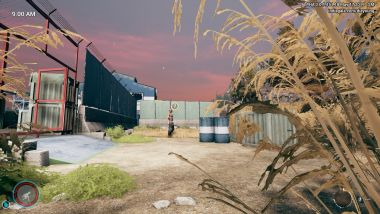
If an enemy blocks your path, you can cause a distraction by throwing (Controls) a rock. You can throw the rock in any direction, and it will cause noise that the enemy must investigate. (useful to open zones where enemies block the path).
Perception and Enemies
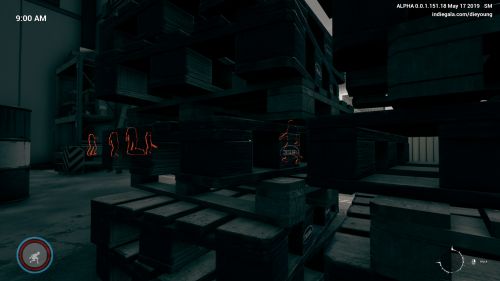
You can use Perception (Controls) to highlight near enemies (useful to look is there any enemy in your path).
Enemies and Movement Path
All enemies in the Harbor have a specific movement path; you need to learn these routes to try to evade them.
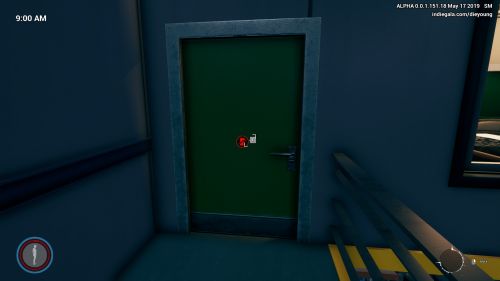
Locked Doors (from the other side)
Some doors will be locked from the other side. To open it, you need to find an alternative method to enter the site and unlock it from inside.
The First Crossbow
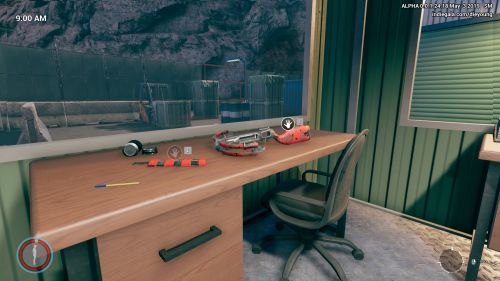
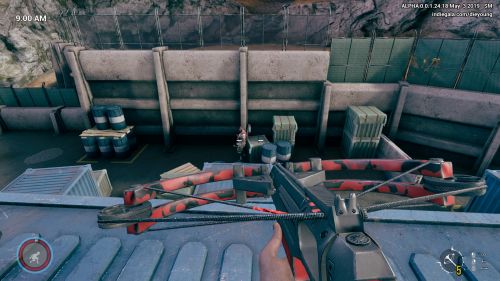
In the Harbor, you will find the first Crossbow (Weapons).
The Crossbow is one of the most powerful weapons of the game. The Crossbow can be used to kill enemies from the distance without being detected.
The Crossbow use arrows as ammo (arrows can be founded in the Harbor or killing Ranged type enemies (Enemies).
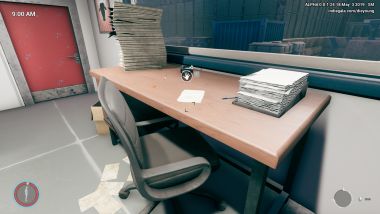
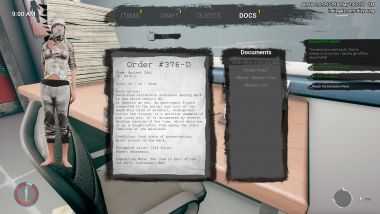
Document (Item #376-D (Ancient Idol)
Tip: Quiver
Tip: kill that enemy with the Crossbow (shooting an arrow towards the head) to get the Quiver.
The Quiver is a useful item that allows the player to stack arrows.
Marked Zones
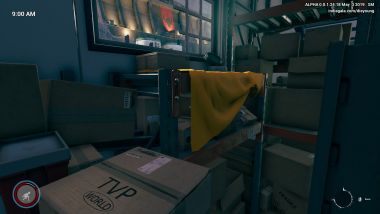
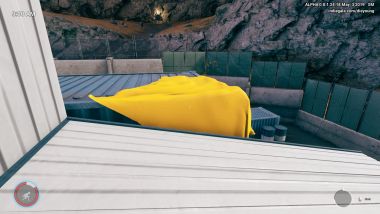
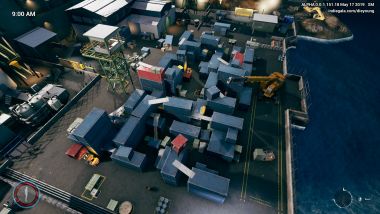
In the Harbor, you may come across some marked zones, which can be identified by a yellow cloth. These yellow cloths suggest a possible route to finding the objective.
Lift Truck
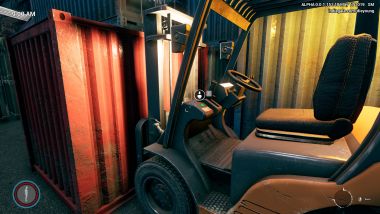
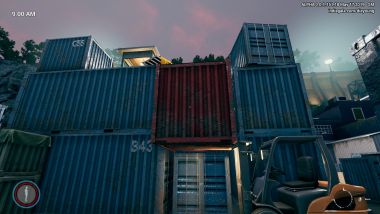
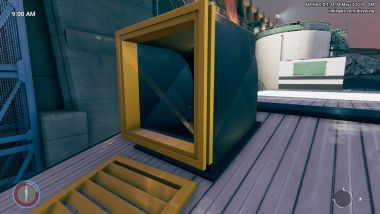
You can activate the button of the Lift Truck to lift up one container and sometimes this enables a new path (the Lift Trucks can't be moved).
Tip: Watchtower Enemies
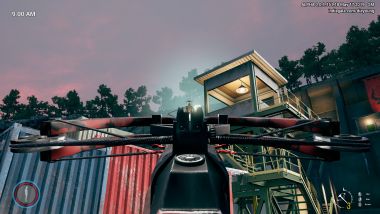
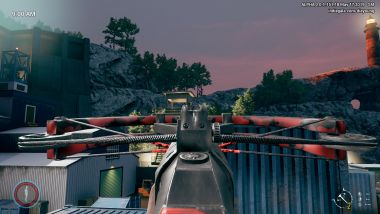
Tip: You can easily kill the Watchtower enemies with a Crossbow; try to reach an elevated position and aim for the head to get an instant kill.
Killing the Watchtower enemies allows you a little bit more of freedom to explore the Harbor.
The First Watchtower - Alarm/Gate
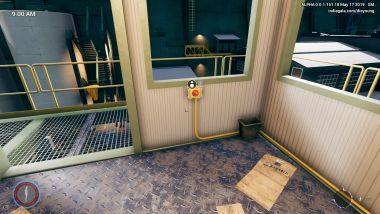
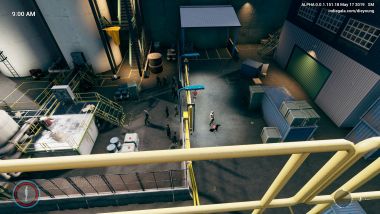
In each watchtower, you can find a button that activates an alarm that'll open the marked gate.
In the first watchtower, you can open the gate to start a fight between the Military enemies and the junkies (useful to clear some enemies from the map).
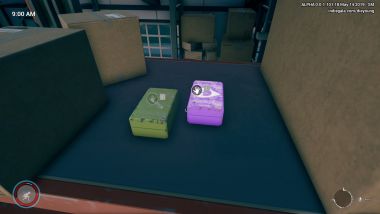
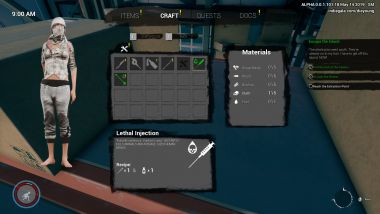
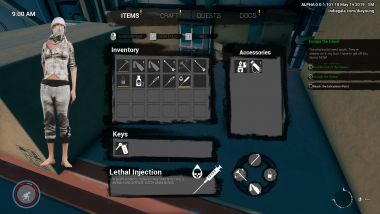
Tip: Lethal Injection
The Lethal Injection is a powerful one-use item that can be used to instant kill Animals and Average-Sized Humans (Military and Junkies).
You can find the material to craft that item in several parts of the Harbor.
Try to use it only in extreme emergencies (if an enemy sees you suddenly, you can instant kill him, without alerting the other guards in that zone) or save it for the final fight.
Master Key
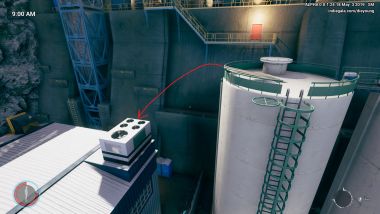
The Master Key is the most important item of the Harbor. With it, you can open all doors that were previously locked.
To reach that location, you will need to do a "faith jump" from the tower to the roof of the other side, and go through the air duct.
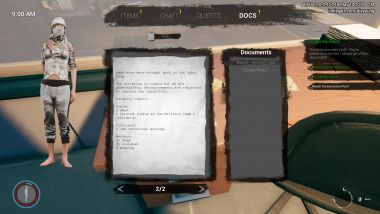
Document (Report - Worker's Riot)
The Elevator
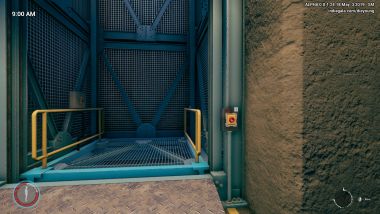
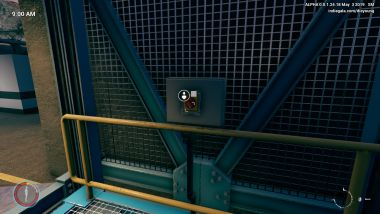
There are two elevators in the Harbor. One is blocked and the other one is accessible.
You can use it to past from the low part of the Harbor to the high part.
Tip: Keep in mind that you are exposed when you use the elevator to cross the Harbor. Sometimes one Ranged Enemy can see you in the Elevator.
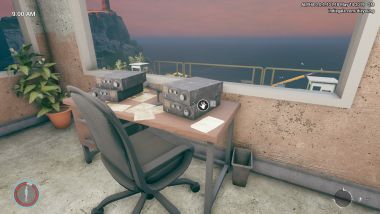
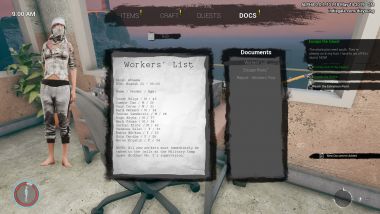
Document (Worker's List)
The Torch
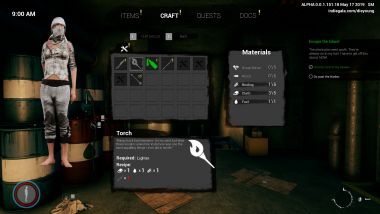
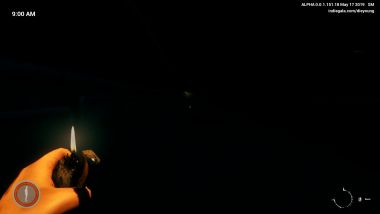
You can craft a Torch to illuminate dark areas. This is useful in one of the zones of the Harbor that is submerged in darkness....and full of enemies.
Tip: you can equip it in the Toolbar, but be cautious when using it, because the torch is a perishable item. When activated, its lifespan is relevantly short. In other words, just use it when you need it.

Sewer - The Harbor
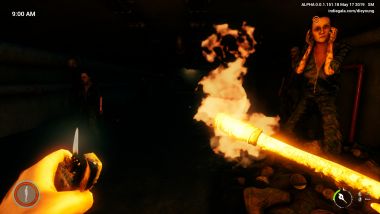
In the Harbor, you will find a Sewer that is plagued by Junkies.
Tip: try to craft some Molotovs to kill the group of Junkies easily (or just run through all the enemies).
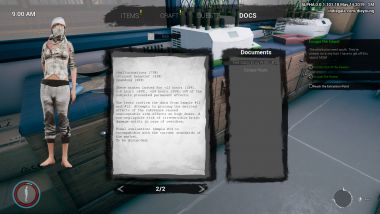
Document (Test Data (Drug AHBC-#13))
The Second Watchtower
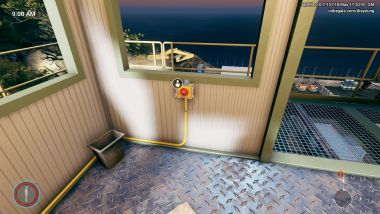
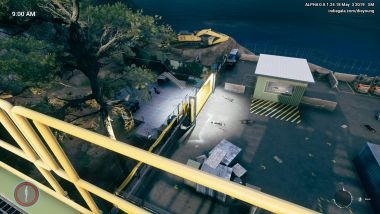
In the second Watchtower, you can activate the button to open the assigned gate (useful to distract enemies and try to pass to the other side).
The Final of the Harbor (part 1)
After a little bit of parkour, you can reach the mountain and final segment of the Harbor (part 1). From here, you can reach part 2 of the Harbor, and then the finale of the Prologue.
